Skip to content

Instantly share code, notes, and snippets.

@EduApps-CDG
Last active January 23, 2025 15:06
Show Gist options
  • Save EduApps-CDG/733e29c28dd53e91128d384c2e879397 to your computer and use it in GitHub Desktop.
Save EduApps-CDG/733e29c28dd53e91128d384c2e879397 to your computer and use it in GitHub Desktop.
A guide of How to Build Linux Kernel using android

How to Build Linux Kernel with Android

This guide shows how to build Linux on a Android Device and was made for people that doesn't have s Computer.

Minimum Requiriments:

  • 4GB of free space (2GB if delete the temp files)
  • Android 5.0

Preparing the Environment

You need to install Termux from Google Play Store. Now we will download the Kernel so we need WGET:

apt-get update &&
apt-get --assume-yes install wget &&
cd ~ &&
wget https://cdn.kernel.org/pub/linux/kernel/v5.x/linux-5.4.6.tar.xz

The next step is decompress that tarball with UNXZ and TAR (integrated with Termux):

unzx -d linux-5.4.6.tar.xz  &&
tar -xf linux-5.4.6.tar

(Optional) Delete the Linux tarball:

rm linux-5.4.6.tar

Now we have the Linux Source on our Android, lets compile!

Compiling

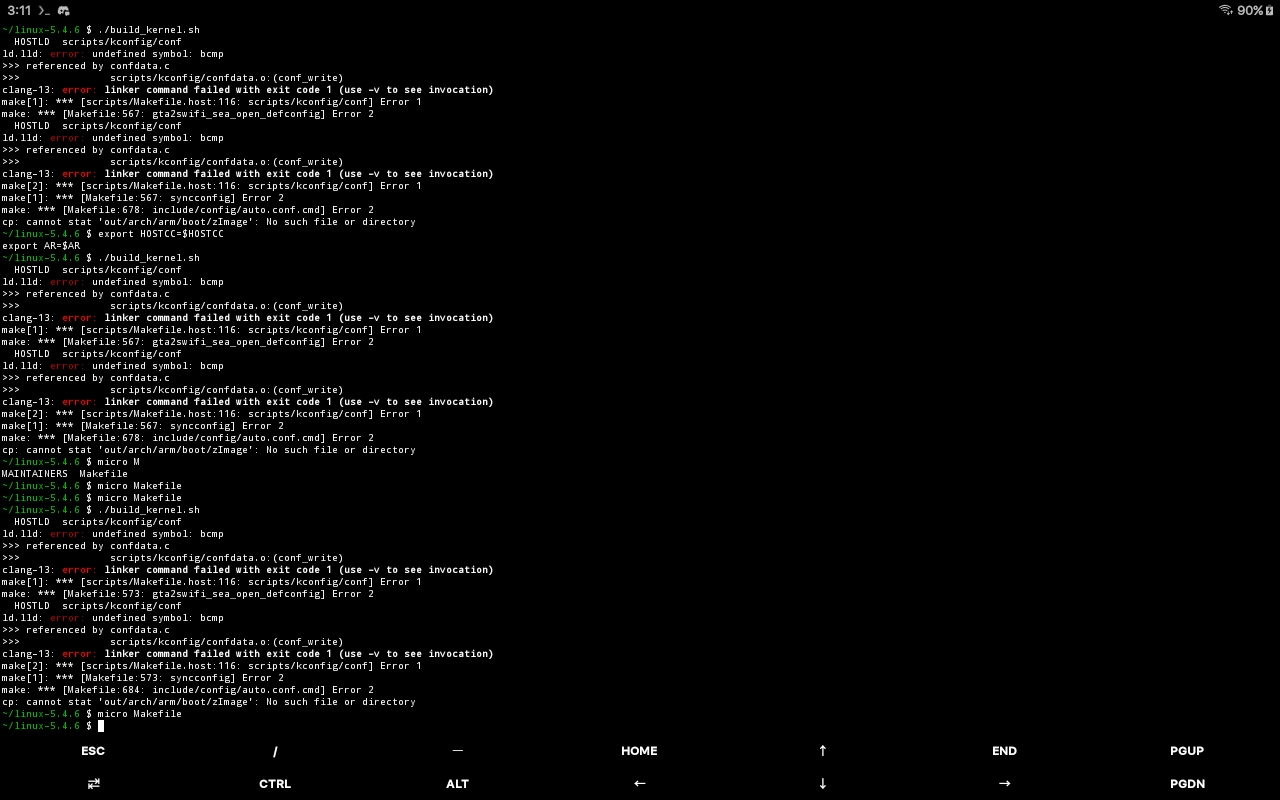
In Android, compile is a terror for Linux Kernel. First we need to create a config file.

The .config file dilemma

If you had an Linux PC you could simply do this:

cp /boot/config-$(uname -r) linux-5.4.6/.config

But you dont have, so we need to do this:

Root mode (easy)

If you have a Rooted Potato Phone you can simply:

cp /proc/config.gz ~ &&
gzip -d config.gz &&
mv config linux-5.4.6/.config &&
cd linux-5.46

No Root mode (medium)

If else, first you need to download it from our repository:

wget https://eduapps-cdg.github.io/kernel-configs/raw/master/android/$(getprop | grep -i ro.product.model | sed "s/\[ro.product.model\]: //" | sed "s/\[//" | sed "s/\]//").gz &&
mv $(getprop | grep -i ro.product.model | sed "s/\[ro.product.model\]: //" | sed "s/\[//" | sed "s/\]//").gz config.gz &&
gzip -d config.gz &&
mv config linux-5.4.6/.config &&
cd linux-5.46

No Root mode (hard)

If the file was not found, you must generate it. It has only one command, but this command is the worst! It's the best choice if you are developing a new device. Complete the first command of Building and type:

make menuconfig

Building

Once solved the dilemma, you will not need to do it again. the next step is install the compilers:

apt-get install build-essential ncurses bison flex openssl libelf clang

This command will setup to build the Kernel with full power, if you have a single core device, it doesn't help so much but works:

make -j $(nproc)
make modules_install
make install

And finally, the Last Step is: Enjoy the building time and drink a coffee!

@scoot1980
Copy link

is it safe to do this?

@EduApps-CDG
Copy link
Author

yes, i done it

@Austcool-Walker
Copy link

This is to install a newer kernel on android correct? @EduApps-CDG

@Austcool-Walker
Copy link

Screenshot_20220203-151117_Termux

@EduApps-CDG
Copy link
Author

EduApps-CDG commented Feb 3, 2022

@Austcool-Walker never tried, what I did was compile a custom kernel for Ubuntu in Termux. You can make custom roms the same way.
About your print, it appears that this is a compilation issue.

Maybe this solves your issue.

@xexuza
Copy link

xexuza commented Jul 12, 2022

Bro when i try this command cp /proc/config.gz it says missing file operand pls help i want to buildkernel without pc

@EduApps-CDG
Copy link
Author

EduApps-CDG commented Jul 12, 2022 via email

@OfficiallyMelon
Copy link

Bro when i try this command cp /proc/config.gz it says missing file operand pls help i want to buildkernel without pc

You need to copy the whole command

@hqnicolas
Copy link

hqnicolas commented Nov 1, 2022

Android 11 Kernel 4.19
Dont work, anyone can help?

~ $ cd linux-5.4.6
~/linux-5.4.6 $ make -j $(nproc)
HOSTLD scripts/kconfig/conf
ld.lld: error: undefined symbol: bcmp

referenced by confdata.c
scripts/kconfig/confdata.o:(conf_write)
clang-15: error: linker command failed with exit code 1 (use -v to see invocation)
make[2]: *** [scripts/Makefile.host:116: scripts/kconfig/conf] Error 1
make[1]: *** [Makefile:567: syncconfig] Error 2
make: *** [Makefile:678: include/config/auto.conf.cmd] Error 2
~/linux-5.4.6 $

@EduApps-CDG
Copy link
Author

EduApps-CDG commented Nov 2, 2022

Android 11 Kernel 4.19
Dont work, anyone can help?

@hotnikq

Hello, did you tried to run it inside a Ubuntu chroot and see if it works?

Also, i got an Android 12 some days ago. I will recheck it later and see if it still works.

@RadioactivePlays
Copy link

RadioactivePlays commented Sep 21, 2023

Can it be used to natively compile the same kernel that is running on the phone?

@cursedastronaut
Copy link

cursedastronaut commented Sep 19, 2024

This is quite outdated - I'm trying to compile the newest kernel (6.11) and I have the same issue (bcmp not found), even adding the flag -fno-builtin-bcmp does not work...
It does not work either with the provided kernel version either.

@outtieTV
Copy link

outtieTV commented Dec 18, 2024

I modified the above guide to fit my device. Hopefully this helps someone, such as @cursedastronaut

January 2025 update: I was able to compile a LineageOS kernel for android on Windows using Ubuntu WSL by following these steps:
Step 1: https://xdaforums.com/t/my-unsuccessful-journey-in-compiling-an-android-kernel-for-the-moto-g-power-2021.4714492/post-89917726
Step 2: https://xdaforums.com/t/my-unsuccessful-journey-in-compiling-an-android-kernel-for-the-moto-g-power-2021.4714492/post-89914796

How to Build a Linux Kernel on Android

I am not responsible for anything that happens. Bricked devices, etc. Use at your own risk.

edit: Before you begin, please backup your stock rom using a tool like Motorola Software Fix or https://mirrors.lolinet.com/
Install F-Droid
Install Termux through F-Droid

January 2025 update: I suggest using Ubuntu chroot instead of Alpine chroot.

Termux:
acquire wakelock through the notification, and then:

$ termux-setup-storage
$ termux-change-repo
$ pkg install apt
$ pkg install root-repo x11-repo
$ pkg update
$ apt update && apt upgrade
$ pkg install termux-auth
$ passwd

Enter new password:
Retype new password:

$ apt install openssh
$ pkg install tsu
$ sudo nano /data/data/com.termux/files/usr/etc/ssh/sshd_config

Within the file, find
#Port 8022
uncomment it and put any port you want.
Within the file, find
#ListenAddress 0.0.0.0
uncomment it
ctrl o to write file
ctrl x to exit nano

$ sshd
$ ifconfig -a

My ip is 192.168.1.166

Windows: Download putty and ssh into phone via internal ip
example: 192.168.1.166 port 8022

Putty:
$ pkg install screen

$ pkg install busybox
$ mkdir alpine
$ cd alpine
$ pkg install wget
$ wget https://raw.githubusercontent.com/stnby/AlpineDroid/refs/heads/master/setup.sh
$ chmod +x setup.sh
$ sudo bash setup.sh
$ sudo nano /data/alpinedroid/chroot.sh

edit the 2nd line so that it says ./bin/sh instead of /bin/sh
$ nano start.sh

#!/bin/bash
sudo bash /data/alpinedroid/up.sh
sudo bash /data/alpinedroid/chroot.sh

$ nano continue.sh

#!/bin/bash
sudo bash /data/alpinedroid/chroot.sh
$ chmod +x *.sh
$ bash start.sh

alpine chroot:

$ apk update
$ apk upgrade
$ apk add nano
$ mkdir /transfer
$ cd /transfer
$ apk add build-base ncurses-dev bison flex openssl-dev libelf clang bash openssl perl

last build for linux kernel 5.x according to: https://en.wikipedia.org/wiki/Linux_kernel_version_history

$ wget https://cdn.kernel.org/pub/linux/kernel/v5.x/linux-5.19.17.tar.xz
$ unxz linux-5.19.17.tar.xz
$ tar -xf linux-5.19.17.tar
$ rm linux-5.19.17.tar
$ cd linux-5.19.17
$ mkdir out
$ export TMPDIR=/transfer/linux-5.19.17/out

make config options can be found here: https://docs.kernel.org/kbuild/kconfig.html
options are such as: make defconfig, make allmodconfig, make allyesconfig, etc

I found borneo-defaultconfig for my phone in kernel-msm-MMI-RZBS31.Q2-143-27-13\arch\arm64\configs\vendor\ext_config\borneo-default.config and was able to cp it to borneo_defconfig in necessary folders. https://github.com/MotorolaMobilityLLC/kernel-msm/releases/tag/MMI-RZBS31.Q2-143-27-13

Similar config files options exist for other phones in kernel repositories for those phones.

$ make menuconfig

use arrow keys, space to highlight, and enter to confirm
$ exit # to return to termux outside of alpine

$ screen -S kernelMake
$ bash continue.sh
$ cd /transfer/linux-5.19.17

$ nano build.sh

#!/bin/bash
export TMPDIR=/transfer/linux-5.19.17/out
make modules -j$(nproc)
make -j$(nproc)
make modules_install
make -s image_name

do not replace image_name with an image name, instead leave it as is.

save and close nano with:
ctrl o
ctrl x

$ chmod +x build.sh
$ bash build.sh

ctrl a d to close screen and let it run in the background
screen -xS kernelMake
to get back into the kernel making script

DO NOT USE KERNEL FLASHER APP TO FLASH YOUR KERNEL OR YOU MIGHT BRICK YOUR DEVICE.

ONLY USE IT FOR KERNEL BACKUPS

$ exit
$ cd /data/alpinedroid/transfer
$ cd linux-5.19.17
$ cd arch/arm64/boot # or whichever arch you are using
$ sudo ls

$ cp Image.gz ~/workingdir

Open Ex Kernel Manager App on your android phone
Go to tools -> Kernel backup
Backup your active boot img to your Download folder
Name it flashedboot.img or something

Go back to putty or termux:

$ cd ~/storage/shared/Download
$ cp flashedboot.img ~/workingdir
$ cd ~/workingdir
$ pkg install mkbootimg
$ pkg install abootimg
$ gzip -dk Image.gz
$ unpackbootimg -i flashedboot.img -o out/
$ cp flashedboot.img out
$ cp Image out
$ cd out
$ abootimg -x flashedboot.img

This guide helped me find my ramdisk offsets and such:
https://xdaforums.com/t/tutorial-kernel-post-compilation-guide-how-to-turn-kernel-into-img.3604083/
When using Android Image Kitchen, I found it easier to use on windows than on linux. And transfer files with localsend.

$ mkbootimg \
--kernel Image.gz \
--ramdisk magisk.img-ramdisk.cpio.gz \
--cmdline "androidboot.hardware=qcom androidboot.console=ttyMSM0 androidboot.memcg=1 lpm_levels.sleep_disabled=1 video=vfb:640x400,bpp=32,memsize=3072000 msm_rtb.filter=0x237 service_locator.enable=1 swiotlb=2048 loop.max_part=7 androidboot.hab.csv=20 androidboot.hab.product=borneo androidboot.hab.cid=50 buildvariant=user" \
--base 0x00000000 \
--pagesize 4096 \
--ramdisk_offset 0x01000000 \
--tags_offset 0x00000100 \
--output boot-new.img

$ cp boot-new.img ~/storage/shared/Download

Move the file boot-new.img from your Android smartphone to your Windows desktop.

Reboot your phone into fastboot mode (device specific, google for instructions)
Install adb tools on your windows desktop and add C;/tools/adb to your windows system environment variables path.

cmd.exe

$ cd C:/Downloads
$ fastboot flash boot_a boot-new.img
$ fastboot flash boot_b boot-new.img
$ fastboot reboot

I had to use:

fastboot flash boot_a magisk_patched.img
fastboot flash boot_b boot-new.img

Your boot_a and boot_b partition names might vary and which img to use for which one might vary.

To unbrick:

$ cd C:\Users\myname\Downloads\BORNEO_RETAIL_RZBS31.Q2_143_27_25_subsidy_DEFAULT_regulatory_DEFAULT_CFC.xml
$ fastboot flash boot_a boot.img
$ fastboot flash boot_b recovery.img

Troubleshooting:
module.order error:

submake error:

  • try a different linux kernel version

gimple build error:

bcmp or memcmp error:

no operating system found:

verify kernel version:
$ uname -mrs

@cursedastronaut
Copy link

cursedastronaut commented Dec 19, 2024

Thanks

@outtieTV
Copy link

outtieTV commented Dec 19, 2024

Thanks

I also got it working under ubuntu chroot, but alpine is smaller.
install ubuntu chroot: https://github.com/LinuxDroidMaster/Termux-Desktops/blob/main/Documentation/chroot/ubuntu_chroot.md
apt-get install wget build-essential libncurses-dev bison flex openssl libelf-dev clang libssl-dev bc cpio kmod -y

@Kikiisyourfriend
Copy link

outtieTV is my go to for knowledge.

Sign up for free to join this conversation on GitHub. Already have an account? Sign in to comment